
Professional History |
Main ëHome: http://www.TheCloudOSCenter.com | http://www.TheGCODECreator.com
This HackedProcessKiller is recommended for Windows 10+ to block the hackers from login/hacking into your Windows computers with the well-known 200+ hacked processes from the 'HackedProcessNames.list' and 'HackedProcessGroup.list' files under the HackedProcessKiller app folder or in the zip file HackedProcessKiller_v1.31.zip which can be downloaded and unzip from the link 'Windows 10 -- Secured Setup for PC with Internet..'; one of the links from the bottom of the main page www.TheCloudOSCenter.com. It is safe to use to protect your computer from hackers, however, you can try with your own experience.
About HackedProcessKiller v1.31 2025/01/05
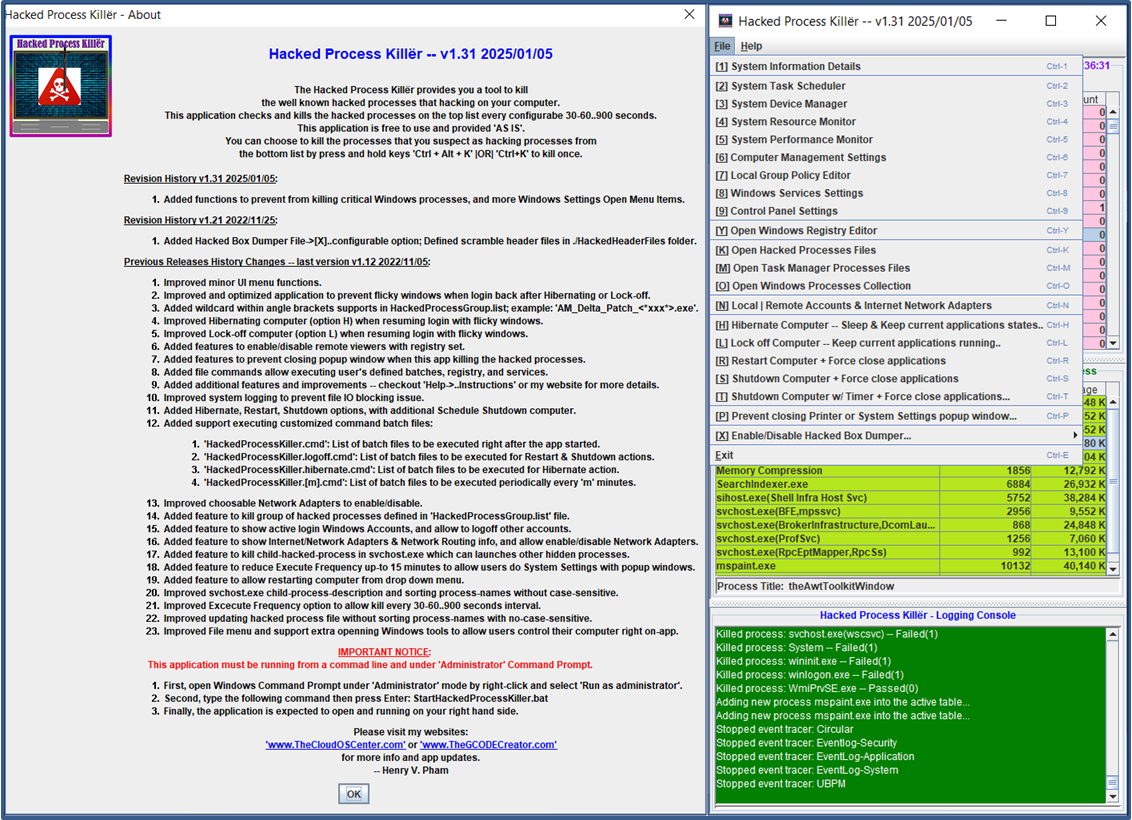

About HackedProcessKiller v1.12 2022/11/25
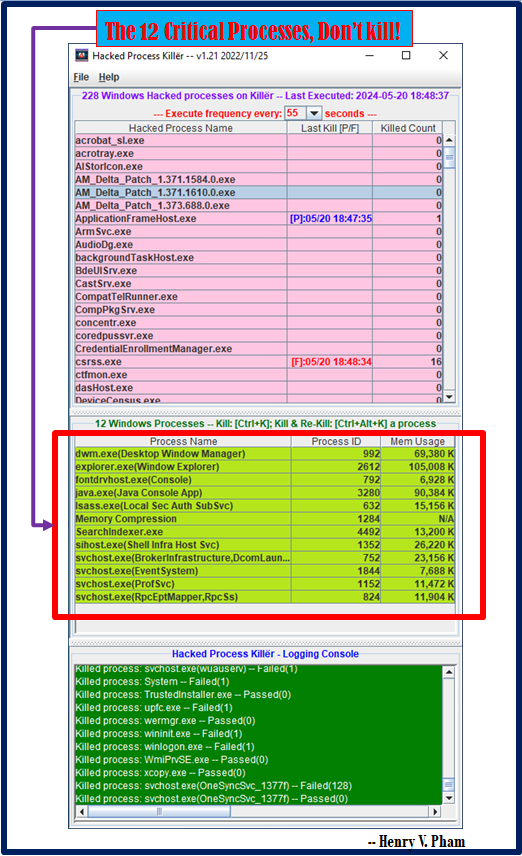
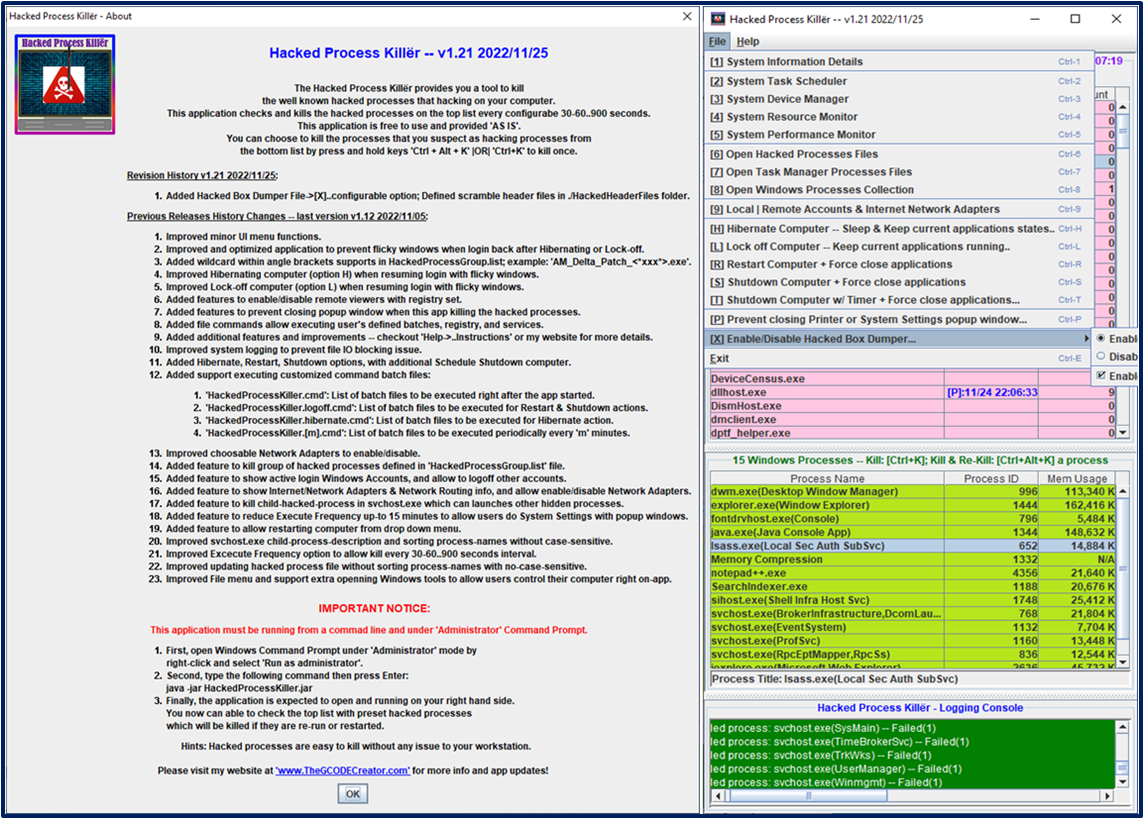
Copyright© and Usage License views.

Full view of HackedProcessKiller app with Internet/Network adapters info.

Remote Viewers & Remote Desktop Registry Settings.

How To Register Customized Commands (Pre: Shutdown, Restart, Hibernate, Post: HackedProcessKiller startup).

How To Register Customized Commands like Registry Set, Start/Stop Services, etc... to execute periodically...

How to check your HackedProcessKiller.jar v1.21 is correct with total bytes and checksums.

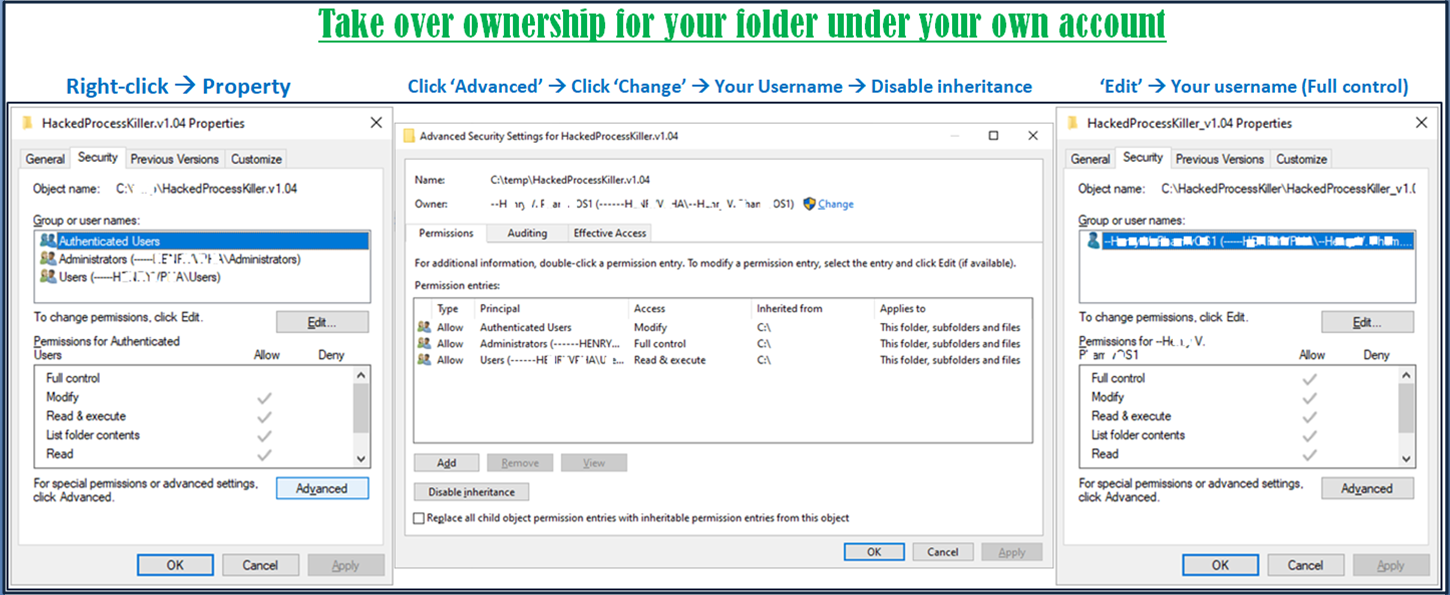
How to take over ownership for your folder or even your entire desktop and all under your account directory C:\Users\[Your Username]\
How to schedule HackedProcessKiller to start automatically when logon
- First, to be more protected you may need to disconnect your computer from the internet,
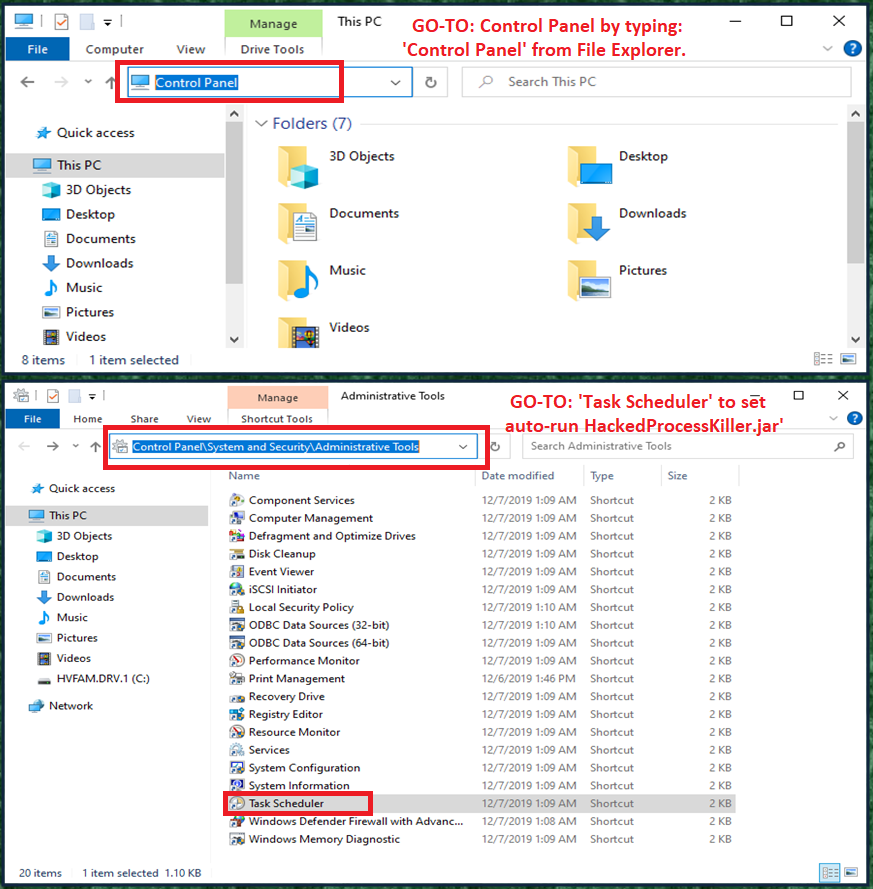
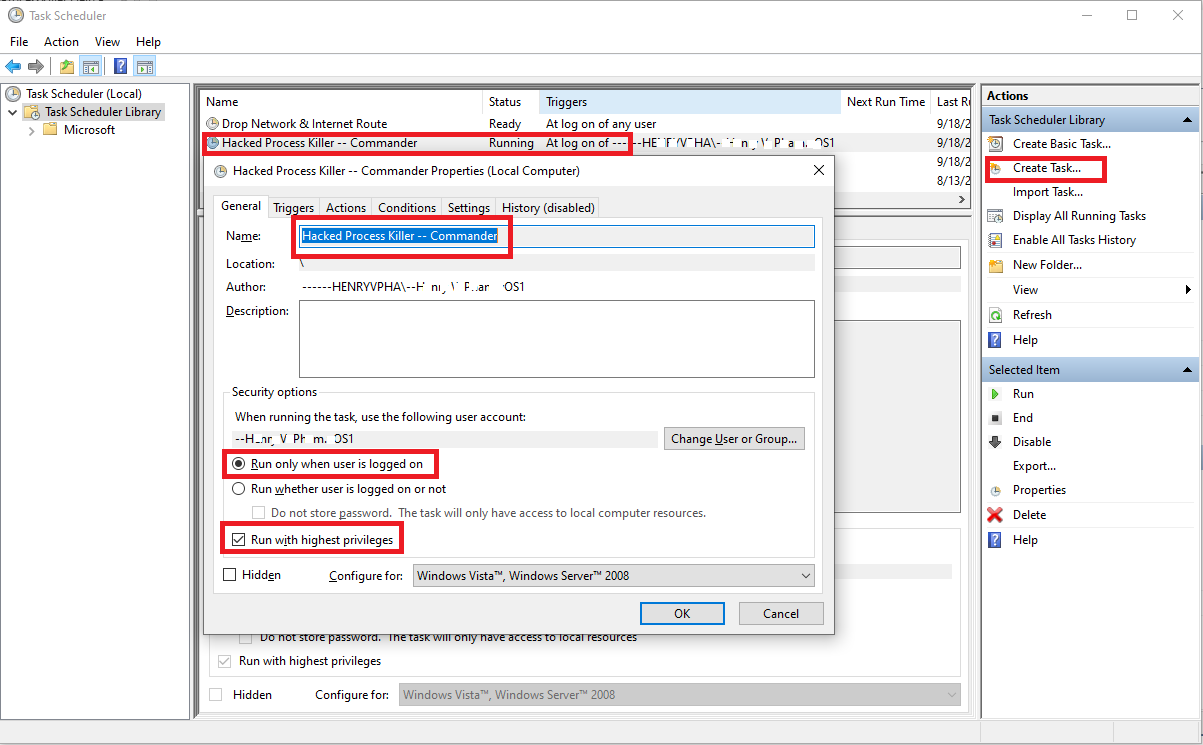
then open 'Control Panel', then go to 'System and Security' and look for Task Scheduler under 'Administrative Tools' as shown below. From 'Create Task...' Enter Task Name 'Hacked Process Killer -- Commander' as shown below.
Make sure to check on 'Run only when user is logged on' and 'Run with highest privileges' mode.
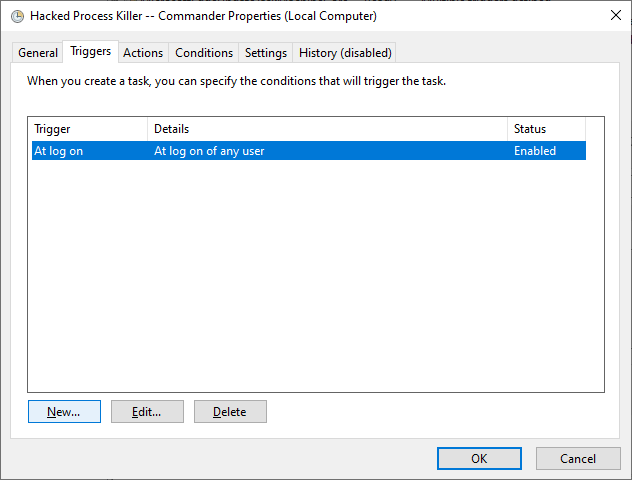
- Second, Set trigger as shown below.
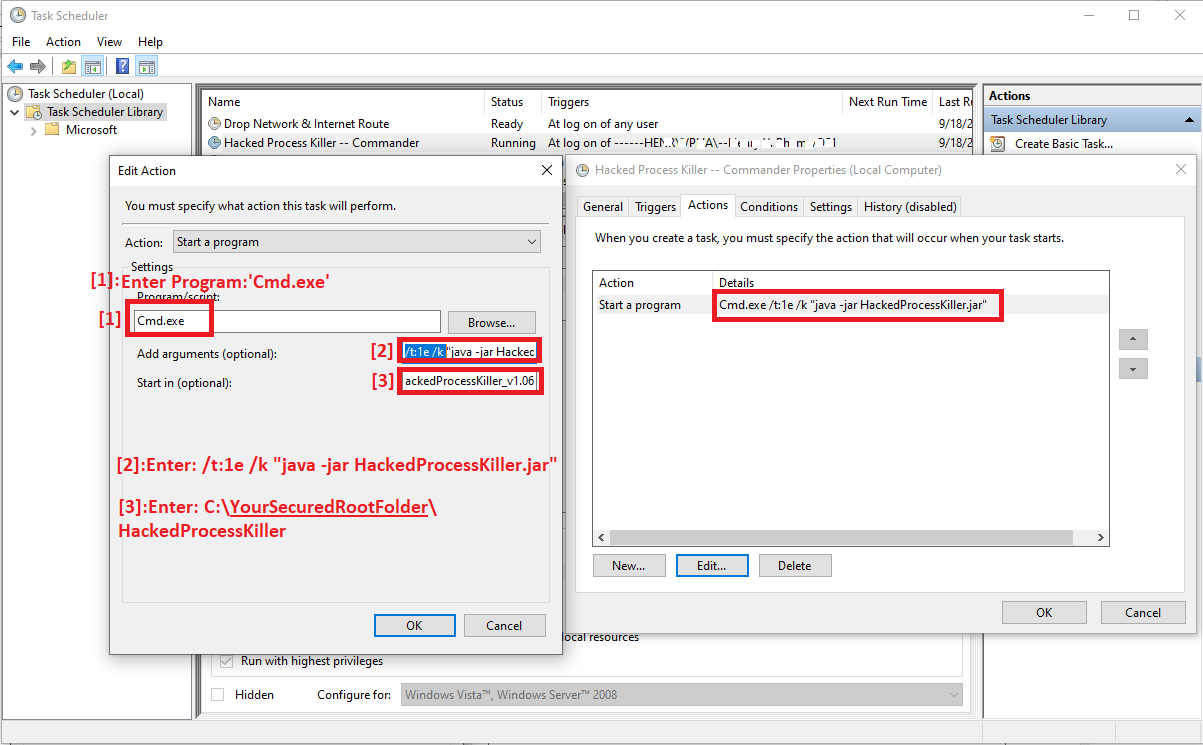
- Third, Create task with program/script name 'Cmd.exe' as shown below with 'Arguments' and 'Start in' options.
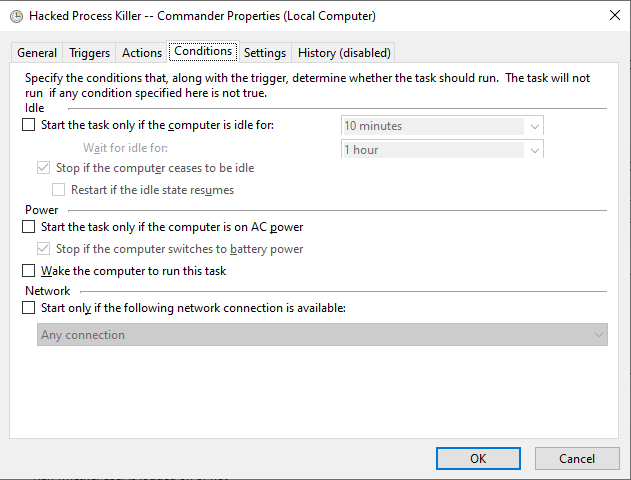
- Fourth, Set Task condition as shown below.
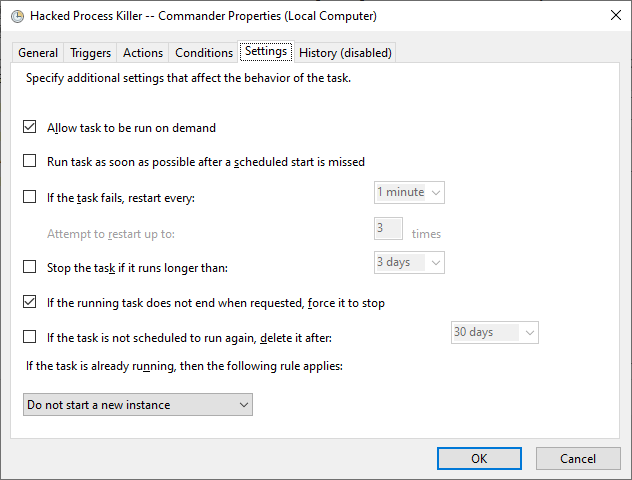
- Finally, Configure the settings as shown below then confirm to close to complete the Task Creation.
You now can reboot your Computer and logon and you will see the task 'Hacked Process Killer' is automatically triggered.
Your computer is now hookup with auto-trigger killing hacked process right at logon.
The HackedProcessKiller provides a tool to kill the well known hacked processes that hacking on your computer.
This application checks and kills the hacked processes on the top list every 1-10..900 seconds.
This application is Free to use and provided 'AS IS'.
You can choose to kill the processes that you suspect as
hacking processes from the bottom list by press and hold keys 'Ctrl+Alt+K'.
How to run HackedProcessKiller
- First, to be more protected you may need to disconnect your computer from the internet,
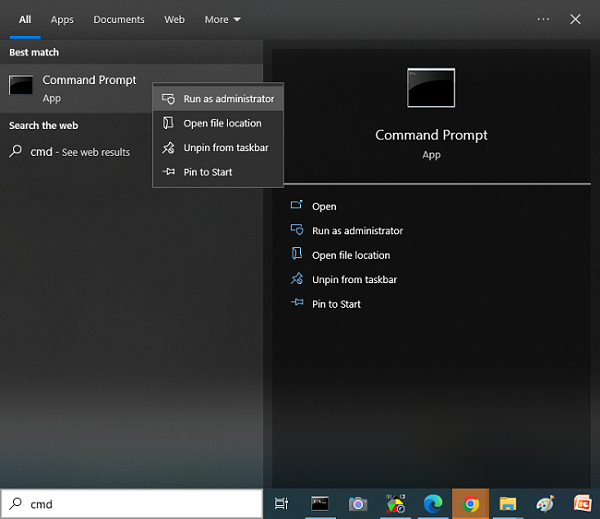
then open Windows Command Prompt under 'Adminstrator' mode by right-click and select 'Run as adminstrator' as shown below.
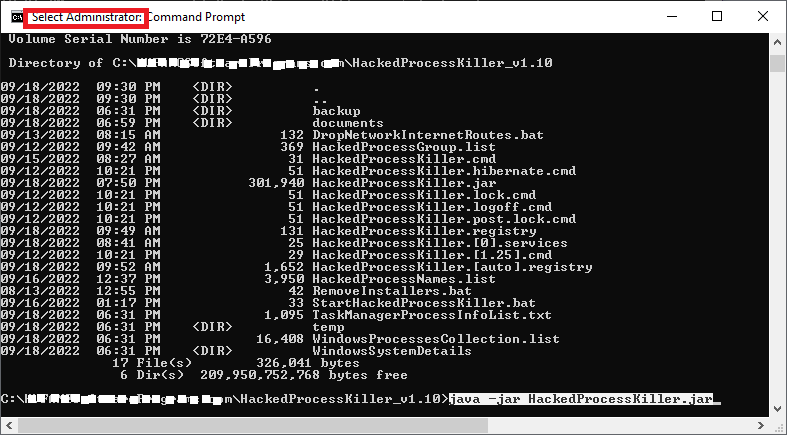
- Second, type the 'java -jar HackedProcessKiller.jar' command as shown in the snapshot below
then press Enter to run this tool under 'Adminstrator' mode to have full Windows Control rights.
- Finally, the application is expected to open and is running on your right hand side Desktop.
You can now able to check the top
list with the preset hacked processes which will be killed if they are re-run or restarted.
NOTE: The Windows Command Prompt must be leave it as open in order for this tool to run.
Now you can reconnect your internet if you have it disconnected.
Some tricks to protect your computer from hackers
- Delete hidden users: Control Panel --> Appearance and Personalization --> Click 'View' (see blow); then delete hidden users C:\Users\[????].
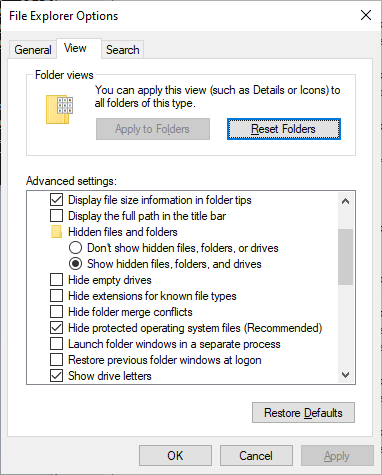
- Take over ownership: for entire your account files/folder and even entire desktop C:\Users\[Your username].

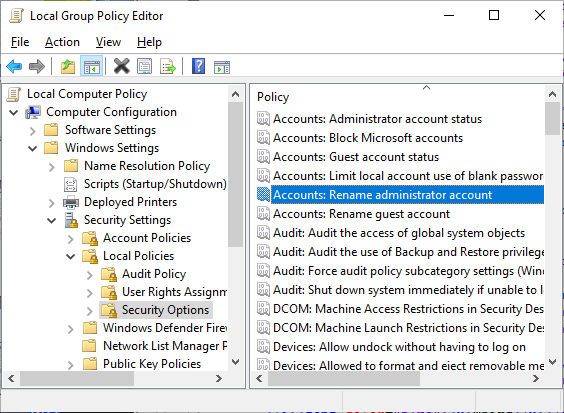
- Rename 'Administrator' & 'Guest' account names to gabage naming: 'WindowsKey+R' --> Enter 'gpedit.msc'.
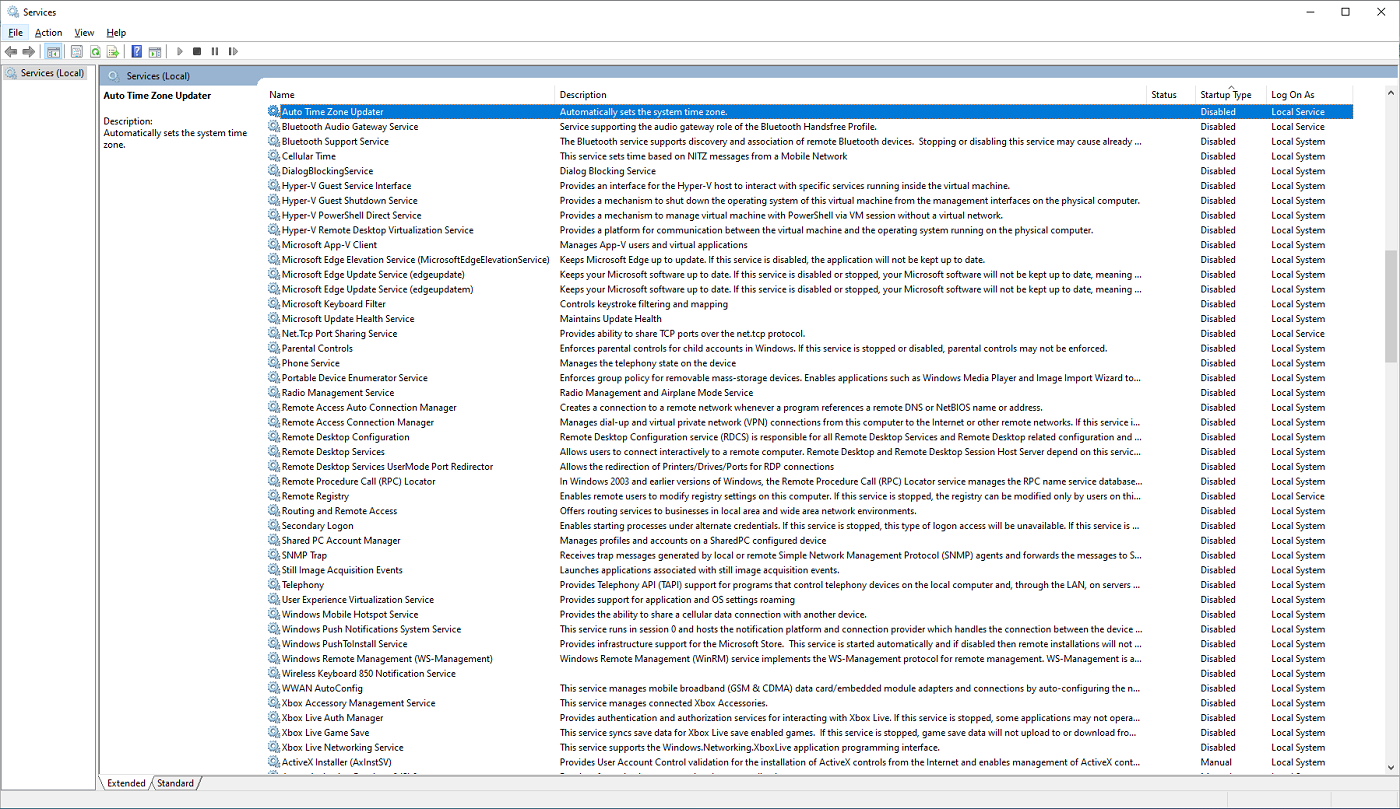
- Disable "unused" Windows services: 'WindowsKey+R' --> Enter 'services.msc'.
|

Linked-in Profile |


